You have decided to launch a WordPress site but you do not know where to start? This tutorial is for absolute beginners. Some computer skills will help, but I guess you want to learn the basics in a few hours. Let’s start
Step 1: what do you want to achieve?
A little planning goes a long way. Be honest with yourself: Why do you think of WordPress? Would you like:
- to create a business website?
- Do you document your life, hobby or interests?
- to set up an incredible web design agency?
- Learn to write code?
- do something else?
WordPress is flexible and manages almost a third of the web – but it’s not ideal for every situation. A website or a library of articles is perfect. Creating a social network or online store is possible, but there may be better options. Using WordPress to learn PHP can be a frustrating experience.
Assuming WordPress is appropriate, are you interested in the technical details or would you prefer to write content? In the latter case, you can work with a WordPress plan managed by DMTwebhosting without the hassle of installing and managing the server.
The moral: Define the problem before choosing a solution!
Step 2: Plan your content
Ideally, you should write all of your content before creating a website. It is the best way to plan a structure and will affect your design.
No one ever does, but plan on at least a few general concepts so you can start anywhere.
Step 3: buy a domain name
A domain name is your primary web address, for example www.abcxyz.com. Keep it short and use keywords that match your content. It may be more difficult than it seems. Most of the good names were registered years ago.
Use a reputable domain registrar like OnlineNic. Prices vary by country and by type of top-level domain (.com, .net, .org, .com.pk, etc.), but a new domain should cost around $ 12 for a one year. Buying a decent preregistered domain from someone else can be a lot more expensive.
Step 4: buy a hosting plan
Your site must be hosted somewhere. Files must be stored on a device that understands how to handle web requests: a web server. You can operate everything from your desktop computer, but it quickly becomes impossible.
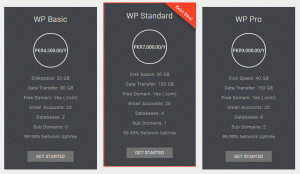
Purchase an appropriate plan from a reputable host like DMTwebhosting. A WordPress-compatible shared hosting plan costs a few dollars a month, and you can update storage and bandwidth as traffic increases.
Recommended web hosting
DMTWEBHOSTING.COM
Do you need a host with fast performance, fantastic tools for web monsters, first-class support, and incredibly reliable hosting? Go to DMTwebhosting. Get up to 25% off now.
You must then “refer” your domain to your new web space. This is usually done by logging into the control panel of your domain registrar, then either:
- Set the host as the DNS name server or
- Modify the domain’s DNS A records to point to the host’s IP address.
Instructions from all hosts and domain registrars, but you may need to seek expert help. Propagation of domain changes can take up to 48 hours. Therefore, you may have to wait before proceeding to the next step.
Step 5: Configure SSL
SSL (Secure Socket Layer) certificates enable cryptographic protocols on your website so that they are available through a https: // website instead of http: //. All communications between your server and the user’s browser are encrypted so that they cannot (easily) be intercepted by third parties.
Configuring SSL is an optional step, but is highly recommended:
- Browsers warn when a site is not secure, especially when filling out forms or sending data.
- Search engines rate secure websites higher than their insecure counterparts.
SSL is essential if you need a progressive web application that can “install” your site and work offline. Adding SSL later is much more difficult. You may need to reinstall WordPress and search engine indexing may be affected.
There is no downside. HTTPS can be added by paying a nominal amount and is considerably slower than unencrypted HTTP (it can be much faster if used with HTTP/2).
You can often install a certificate purchased elsewhere on hosts. However, it is easier to use your own service. For example, DMTwebhosting offers a free Crypton Option in the security area of your site’s cPanel. Click on it and press Install and SSL is enabled.
Step 6: install WordPress
WordPress is a complex application that requires:
- A main MySQL database that stores your configuration, publications, comments, and other information. This must be installed and configured first. A database user ID and password must be set before applications can store and retrieve data.
- A large number of PHP files that make up the WordPress application. These must be copied to the server before performing a configuration process. This will ask for the database credentials before creating the database tables and initial dates.
- After installation, WordPress communicates with the database using the ID and password to allow editing and presentation of the pages.
The majority of hosts offer cPanel – a popular website management feature. You can create your database, download WordPress and install it manually. Fortunately, there is a simpler option. Find or search for WordPress options in cPanel:
About the author
DMTwebhosting.com‘s Editorial Team prides itself on bringing you the latest web hosting news and the best web hosting articles!
You could also link to the news and articles sections:


